Tuesday, December 15, 2015

Fun, Easy Toddler Ornament Craft


Last Christmas, I decided to make something from my son for all of the grandparents. At their respective Christmas parties, they unwrapped 8x10 canvases adorned with his little 13 month old feet, decorations, and "mistletoes" stamped across the bottom.

They turned out to be adorable! Of course, I didn't make one for us, because I didn't think about it at the time, but unpacking our Christmas decorations this year made me kick myself for not making one for our house! Not this year!

I think it's biologically ingrained in parents to cherish anything our children (and grandchildren) make for us. I can't quite explain why, but I remember my parents being so unbelievably excited when my sister and I would bring home little homemade gifts from school or we decorated things without being prompted, and so far, I've felt the same about my kid.

Personally, I LOVE homemade gifts from friends and family and I love making and giving them. That being said, I was struggling with an idea for a Christmas gift/craft for my 2 year old to make. Now, he JUST turned 2, which means his development is quite different from a 2 1/2 year old or almost 3 year old. I've seen huge leaps in his cognitive development in these last few weeks, and this craft was doable for him right after his birthday (and probably could have done it a few months before).

He needed something that was pre-outlined, so he could have room to be creative, but something adults would still recognize beyond toddler scribbles.

Even if you don't celebrate Christmas or holidays around this time of year, it could be modified as a "winter craft" since their brushstrokes resemble conifer branches so well! Little toddler crafting tip:cover their high chair tray with plastic wrap for easy clean-up!

Okay, on to the instructions! You'll need:

1 small canvas (ours is 3x3 in., found at Walmart)
3 shades of green paint
Paintbrushes
Red paint
Star-shaped rhinestone
Glitter glue
Red Rick-rack
Small number stamps and ink or red pen
Blue painter's tape

1. Make the outline of a tree shape with two pieces of painter's tape.
2. Squirt 3 small dots of paint on a disposable surface and give your toddler the brushes (I gave him 3 brushes, but he ended up dipping them all at the same time).
3. After paint has filled in the negative white space between the tape stencil, set to dry overnight.
4. The next day, remove tape carefully, and add decorations/stamps as desired (make sure to label with child's name or initials on the back).
5. Hot-glue or regular glue the Rick-rack to the back of the canvas to turn it into an ornament and the star (or other decoration) to the top of the "tree."

Also, my roses are blooming again! If you look closely, you can see a bee busy at work in the center!


Happy crafting!

Tuesday, December 1, 2015

DIY Rosemary Wreath

It's December 1st, and while some of us have had a trimmed Christmas tree or other holiday decorations gilding our nests since Halloween, some others may still have rotting, painted pumpkins sitting on our doorsteps *sheepishly raises hand.*

I claim being 32 weeks pregnant with my second boy to be my excuse, but that doesn't mean I haven't had the "nesting" or "decorating" bug! I will INSIST that my muscled husband retrieve our decorations (and the baby swing) from the attic this weekend. 

Feeling in the holiday spirit since even before Thanksgiving (the months of October, November, and December feel like one long holiday with my birthday, my son's birthday, Thanksgiving, Christmas, and New Years in a tidy row), but not having the energy or physical capacity to do much nesting beyond compulsively organizing my pantry and washing baby clothes, I have wanted to do some crafts. 

I'm s-l-o-w-l-y finishing some ornaments that my son painted for grandparents' gifts (post to come)  and I was struck with infernal inspiration this morning, coming off a high from successfully baking classic beef pasties with golden onion and mushroom gravy last night (MaryJanesFarm magazine recipe Aug/Sept 2014 issue).

Also, after making this recipe, I officially want to wrap all meals in pastry dough forever and ever, Amen.

(Forgive the crappy photography. I snapped this last minute to text to my mom, not thinking I would use it on the blog.)


While snipping some garlic chives from my herb garden to mix in my scrambled eggs this morning, I noticed that they were being quite crowded by my pushy rosemary plant. Knowing it needed to be trimmed, I attacked it with clippers while my toddler ran up and down the sidewalk, and plucked a few ripe tomatoes from our limping tomato plant. 

What to do with all this Rosemary? A wreath! Our "Give Thanks" sign, topped with homemade ribbon needed to be retired for next year's harvest season, and since not many conifers grow in my neck of the woods, rosemary is an evergreen that smells lovely and looks Christmas-y. 

All I needed was: fresh rosemary sprigs (the woodier, the better), an embroidery hoop, floral wire, and a red bow (I also added some fresh cayenne peppers for a little Southern flair, but that could easily be replaced by cranberries, holly berries, or rose hips)!


With my crafting bug sated, I'm ready to finish decorating (and figure out what to do with the other  20 pounds of rosemary sprigs I cut)!

Happy crafting!


Saturday, October 31, 2015

Oh Baby!

So, remember how excited I was about my garden this spring? Remember how much time and effort and love and investment went into that raised bed and those potted plants? Well, life happened, as they say.

About a month after my last post, when I was close to updating about all of the fruits of my labor about to begin ripening, something happened. My sister-in-love and her husband were spending the day with us on a mild, rainy spring day. She was teaching me how to make farmer's cheese and I was teaching her how to make yeast bread, when I noticed some heartburn.

I don't get heartburn...unless...I'm pregnant.

Oh baby! I was in denial for a few days, as I was still nursing my firstborn and we had been actively trying to avoid another child for at least another year or two, but finally succumbed to the nagging feeling that my body was off.

The test gave me double lines in about 0.5 seconds and I just sat in shock with my head against the bathroom door for half an hour.

I knew what was coming: the incapacitating nausea, the profuse vomiting, the battles to keep anything down, including water, exhaustion that makes me sleep for 16+ hours a day during the first 20 weeks, the dreaded spit-cup attached to my hip that helps immensely in preventing too much vomiting. How was I going to do this with a toddler? I had about a week to figure it out before I hit the wall.

After going to the doctor for a confirmation ultrasound, I numbly expressed my concerns to my mother, to which she replied, "Move in with me until the worst is over."

SALVATION!

After four months of misery, we made it out the other side and back into our own house. Needless to say, my poor garden was a disaster. A few huge cucumbers not worth eating, shriveled bell peppers, and dried-up-everything-else was the sad scene left in the wake of an unusually wet spring, unusually dry summer, and my complete neglect. The only thing that seemed untouched by heat and lack of water was the cayenne pepper (not surprising in Texas), some herbs, and the flowers I had planted for pollinators.

Since being back in our house, the irresistible call of cultivation has turned me to the "Dirt Side." Slowly, with my obstetric complications improving, I've been able to go from just walking in the grass to actually planting a few seeds, mulching, fertilizing, and enjoying the little piece of earth I call my own.

For the fall/winter, I've planted radishes and lettuces in a grow box, romaine in another grow box (though it bolted during a heat wave in October, which I'll replace with beets soon), arugala, one single scarlet runner bean, a handful of Swiss chard seeds, some sugar snap peas, and some MaryJane hard neck garlic (I REALLY want to taste those scapes everyone goes on about). I also have one pumpkin plant that survived the onslaught of some creature that was eating WHOLE plants overnight. I'm not sure if squirrels eat pumpkin plants, but they were my only suspicion, as I never found any bugs on them.


In short, I'm much less ambitious with this garden season, but I can't seem to stay away entirely. More than yields and practical use, gardening certainly gives me a sense of accomplishment, connection with nature, and encompassing sense of well-being.

These feelings, my friends, are the reasons our French sisters grow something in their homes. Even the smallest of apartments most often have at least a window box of herbs or flowers to answer that carnal search for cultivation.

DIY Magnetic Fishing Game

"Les poissons, les poissons! How I love les poissons!"

One of my favorite Disney tunes inspired a homemade gift for my son, who will be turning two tomorrow (eek!). The string is a little long and he might not be quite advanced enough to play the imaginative game of "catching" the fish, but I know he'll at least enjoy how they stick together.

Their construction is simple, though I'm terrible about remembering to take photos for tutorials (even though I'm a hopelessly visual learner).

I free-handed the fish and worm on junk mail and cut out all of the felt pieces. For the fish, I: attached the button eyes and embroidered the mouths, hot glued some cheap, weak magnets between the pieces (trying to prevent any swallowing accidents!), and used a blanket stitch around the edges for a cute look.

For the pole and worm, I had my dad bring some small, industrial strength magnets (he has everything AND a kitchen sink in his spare garage, that we ladies lovingly named "his toy box" when we were children), hot glued the magnet and a strip of leather string between the pieces, used a blanket stitch around it again for visual continuity, and attached it to the pole.

The pole is just a thick dowel from the hardware store that I (unglamorously) sawed in half. My original plan was to drill a small hole in the end, thread the leather string through it, and tie it off, but, thanks to pregnant brain, I can't find ANYTHING, which means I lost the drill bit.

Instead of my original plan, I simply rolled the string in some felt with hot glue and crossed my fingers my dear son won't be too rough with it.


P.S. I apologize for the horrendous photography. We've had nothing but rain and clouds for a week. No natural light=sub-par photos.


Wednesday, March 25, 2015

Wild Onions and Upcycled Pillowcase

We bought a house, y'all-officially-with a yard and a pre-existing clothesline. It's 1950-1970s-tastic, with wood paneling, horrible wallpaper in the bathrooms, and solid wood doors. It has an island on casters and beautiful sold-wood cabinets. Our blast-from-the-past also has a built-in rifle case in one hallway and a nautical light in the other hallway.

I'm officially in love with our house.

The other thing with which I'm in love? Our porch and yard. It's a small, standard city lot, with the original cyclone fence (we're currently building the privacy fence, thanks to an aggressive neighbor's dog). Plus, when I met our other new neighbors, they were ecstatic to know that someone bought the place who didn't own a dog (seriously guys, we're surrounded), but then you should have seen her face when I mentioned we'd have a few chickens in the coming months.

I tried really hard not to laugh.

Moving on to today's topic: wild onions and upcycled pillowcases. I'm so freakin' excited about our clothesline. Did I mention our awesome clothesline? When you've spent the last four years using an indoor drying rack and electric dryer that you know is just throwing money in the toilet, you'd be excited too.

Now that we have this wonderful contraption (hooray for old zoning laws in small towns which allow us to even have one), I can put it to good use and achieve that tantalizingly fresh smell one can only get with line-dried clothes.

However, I've run into the problem of my toddler breaking every clothespin he can get between his little hands. Seredipitously, in the Mary Janes Farm Sister issue for this month, one of the writers wrote instructions for upcycling an old pillow case into a clothespin bag to be hung from the line while working.

Well, her example was adorable, however, I am NOT the best seamstress when it comes to flat, round edges. They're not pretty, y'all, plus I didn't have any binding tape, and I didn't want to spend the time hand-making some. During the precious moments of my son's nap, I'm usually occupied, cleaning the kitchen, baking, cooking, unpacking, or reading. This leaves little time for sewing, so I looked for a pattern with straighter seams.

After a few fruitless minutes, I decided to just wing it. The result has ugly seams, and crimped ribbon, but it serves it's purpose:


I used a yard stick and the hanger to make the length and width, leaving one side attached, so that once cut, the fabric was one long piece. (In hindsight, I should have taken pictures while making it, but did I mention my time crunch?)

Because the open, pre-seamed edges are already reinforced, I used that as the bottom of the bag.

Next, I looped and cut three ribbons of equal size to act as the hangers hanging on the hanger. I love English. Then, I pinned the edge to form a seam (including the ribbons equidistant from each other). Sew.

After finishing with that seam, I folded it right-side in, and pinned to make the bag shape. Sew. Turned it right-side out, fixed the corners, and sheared the ribbon loops, so that I had two ribbons facing each other. Tied these ribbons on a hanger. I didn't have time to embellish
today, but I will do so later. Did I mention the time thing? I think I did. All in all, this project took about 15 minutes, and is so handy!

Now, onto the wild onions. I'm doing some major gardening experiments this season. My fascination with plants has evolved slowly, beginning with-you guessed it-France. My host family had a beautiful garden out back, and always had edible herbs and lovely flowers growing. My organic education began there as well, and has also evolved over the years.

I was terrified to begin growing plants. They don't tell you what they need like a kid or a dog. The few plants I tried to grow when I was young ended up getting drowned or forgotten, so I decided to start slowly. A large herb garden and my first fruit tree graced our apartment balconies these last few years and grew (pardon the pun) until I fell pregnant with my son.

Everything died but my Rosemary, aloe Vera, and lemon tree, and those were barely alive once I came out of my horrible morning sickness. Last spring, overwhelmed by new motherhood, I added only some garlic chives to the mix (scrambled eggs with garlic chives and some milk, salt, and pepper are DIVINE).

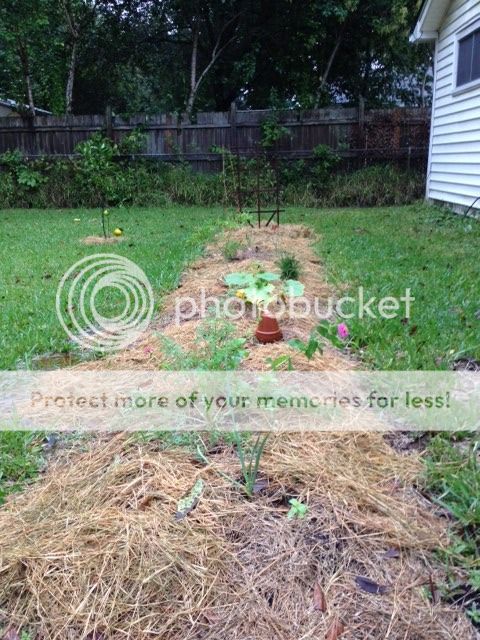
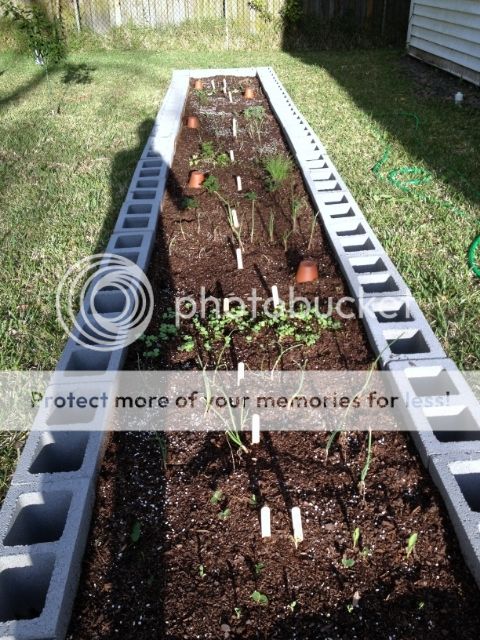
This year, with our new yard, I busted out some seeds I've been collecting and dove head-first into the world of raised beds. After mulling over building materials, I decided to go with plain 16 inch cinder blocks for the edges. They're tough, easy to move and reassemble into other shapes, and won't rot. Best of all? They require no saw, drill, or real maintenance and are cheap.


One caveat. They are ugly. I will paint them eventually, but I was so concerned with getting my seeds in the ground before it got too hot, that I didn't care this season.

Companion planting. Have you heard of it? From the research I've done, apparently, certain plants compliment each other: radish and lettuce, strawberries and spinach, onions and carrots, etc. one really cool one is the "three sisters." Practiced by American Indians, corn grows straight up and acts as a trellis for the nitrogen fixing bean or pea plant, and squash crowds out surrounding weeds and retains moisture in the soil by preventing evaporation. Pretty sweet, right?

In my fervor to  learn how this stuff works, I decided to "mimic nature" and plant companion seeds haphazardly in zones (i.e. I was too lazy to plan out rows). My garden looks something like this:

Three sisters (Glass Gem corn, sugar snap peas, crookneck squash)

Carrots and 10-15 onions

Lettuce and radishes, both assorted

Bell pepper and calendula

10-15 onions and assorted beets

strawberries, spinach, garlic chives

more onions and carrots (we eat lots of onions and carrots)

Parsley and assorted tomatoes

Snap peas

Courgette (zucchini, but I like the French name better)

Borage, nasturtium, calendula and two celery re-grow experiments (yep, I'm trying a Pinterest thing)

Cucumber and watermelon

Three Sisters (Sweet corn, snap peas, butternut squash)


What a mess! I know I planted waaaayyyy too much in the space I have, but I keep telling myself this season is experimental. I'm not all that familiar with growing annuals, because all of the herbs, flowers, and fruits I've grown are perennial (except parsley and basil).

I'll be watching and recording what grows well, what dies out, what takes over. We learn best from mistakes, right? RIGHT?!

Anywho, with the annual beds tucked in for the season, I've been stumbling around town lately, coming across various wild edibles. (I'm addicted to this blog.) Although I've been fairly certain about my identifications, I haven't actually gotten the nerve to eat any of them except chickweed and wild blackberries.

This is how my brain works: oh, that looks cool. I think I've seen that on Foraging Texas, let me look it up! Yeah, looks EXACTLY THE SAME. Mmmm, better not eat it, could be contaminated by the road, the dog in the yard, the......

See my problem? I have this theory that if I glean a few important ones from around town and grow them in my perennial beds (will construct along fence after fence is constructed), and they grow on their own, I'll feel better, because I know what's in my dirt. Make sense? Hmmm.

I may have OCD.

Well, I have a small partially shaded area that already has a cute picket fence by it, so I decided that if I found any wild edibles I want, I'll plant them there and water them and see what happens.

You may be wondering why I care about hunting wild edibles. Aren't domestics (the veggies at the grocery store which have been bred and selected over hundreds of years to create what we eat daily today) what we're "supposed" to eat? Yes and no. Domesticated plants are often fussy and are particular about water, sun, climate, and soil.

Wild natives are more suited to one's local area (climate, soil, etc), and tend to stock more nutrition than the average domestic (Ex: lamb's quarters, a wild relative of spinach, has 3 times the amount of calcium compared to spinach). Plus, they can bring visual and flavorful interest to domestic dishes.

I can go on about the wild ones, but in reality, I just need some plants that will take care of themselves because putting together annual beds every year can be time-consuming, labor-intensive, and expensive.

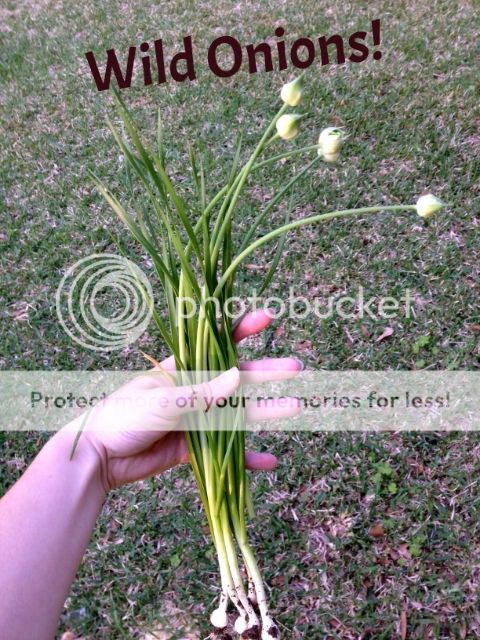
Back to the wild onions. Plantain, wild violets, wild primrose, and chickweed have been springing forth in abundance, but I haven't had the nerve to glean them yet. That changed today! While taking a family walk, I spied from across a big drainage ditch a robust flower that looked like an onion flower! Crow's poison (which is slightly toxic to humans and somewhat resembles wild onions is sprouting EVERYWHERE) has had me fooled a few times from a distance, so I didn't hold my breath when I came upon the humble plant.

Crow's poison smells like grass. Wild onions smell like onions, so I smell-tested the leaves and flower bud. YAY! Well, my husband and son had gotten quite ahead of me at this time, so I caught up with them, resigned to go back to the vacant lot and dig them up tomorrow.

We walked the rest of the mile home, and one street over, I saw a beautiful little tuft of grass with the onion bulbs swaying in the breeze above it, just sitting atop a culvert.


Excitedly, I bent over the colony of onions, grasped the base, and pulled straight up. They all came out easily and the smell reminded me of the last time I climbed Enchanted Rock. When we shimmied down the side of the granite batholith, a stream cut through the rock and nothing but HUGE colonies of wild onions grew along the water. The smell was sublime and identical to the ones in my hands.

The perfect little bulbs accompanied us home, where I planted them along the fence with some wild violets. I'll keep you posted on their growing. Tomorrow's agenda? Glean some healing plantain.

Happy homesteading!

Friday, January 9, 2015

Forgiving Bread


I've always had this thing about bread. A comforting food that can be smothered with all types of gooey, jam-y, buttery goodness, bread has long been a favorite food of mine. Cue my years in France: my fondness for the simple loaf has burned to an obsession.

See, I grew up on the long shelf-life loaf so common in American grocery stores. I'd only ever had "fresh" bread a few times before my journey to France and I was more contented making buscuits anyway. I had no idea what I was missing.

Bread is the core-nay the heart and soul- of French cuisine. Breakfast? Bread and jam. Lunch? Bread and cheese and meat with crudités. 16:00 snack? Tea and cake or tea and bread. Dinner? 3 course meal and BREAD!

One of the first things I noticed was the deeply nourishing flavor of bread in France and after heavy research and hounding of the local boulangerie owners, my answer was simple: water, honey, grain, yeast, salt.

WHAT?! There's no secret ingredient? No fairy dust? No magic spell to justify my hefty consumption of this new staple?

I had to learn their secret. If you've read some of my earlier blogs, you know my last attempt at bread-making was a catastrophe. Baking soda and baking powder are comfortable leavenings that I trust. Yeast has dark secrets that I've never been able to uncover. Until a few weeks ago.

You must understand I am a Pinterest addict and also obsessed with the Song of Ice and Fire series by GRRM. The obsession collided when I stumbled upon Inn at the Crossroads, a food blog featuring the sumptuous foods of the Westerosi Universe, and there inlay my bread-making salvation.

The Crusty Bread recipe was simple to make and used the exact ingredients recommended to me by the French bread-sages. After following the recipe religiously, my first batch was ready to taste.

Mouth watering, I tore a side of steaming, springy goodness, lathered it with salted butter and reveled at the wondrous flavor. The texture was perfect. The weight was perfect. The CRUST was PERFECT.

I was pretty excited, y'all.

Over the next few weeks I began experimenting (both, intentionally and not) with the recipe to accommodate my needs. The batch the recipe makes is enormous. We're talking 4 large loaves here. I love bread, but I also like it fresh, so I began halving the recipe and making it every other day.

The only problem turned out to be time. The mixing and needing time was eating up the precious hour I get every day when my toddler is asleep (yes, I have a toddler now, hence my long absence). Some days, I enjoy relinquishing my frustration into the dough with a good, hard kneading session (seriously, it's almost as good as crying), but most days, I need (pun intended) my time.

Therefore, I discovered a modified recipe for a bread maker. This recipe-handmade or machine made- is very forgiving. Seriously, I forgot the salt once and, though bland, the bread was still totally edible.

Forgiving bread recipe (for machine):

1.5 cups water
1-2 Tbls honey
4 cups flour (I use unable ached organic white, though substituting 1cup with whole wheat will still           give you a good rise)
1 package of active dry yeast
1 Tbls Sea salt
* 1 tsp-Tbls each of sunflower, poppy, sesame, pumpkin, and flax seeds

*optional

Mix the water and honey together, pour into machine. Add the flour and other ingredients according to your machines directions for basic bread dough. Set your machine on the DOUGH option. Once the rise is complete, wet your hands and transfer dough to a cookie sheet covered with parchment paper. Dive. Shape. Cut a few lines in the dough with a serrated knife. Let rise another 40 minutes to an hour. Set oven to 450 degrees and place a pan of water on the bottom rack (I use an enameled pan for cooking turkeys). Bake dough until the crust sounds hollow when tapped (I use a wooden spoon). Transfer to cooling rack.

Happy baking!